
Planning a workflow
Create a workflow from a plain-language goal, review the proposed pipeline on the canvas, and save it.
The console creates workflows from a goal: you describe what you want to happen, and the planner proposes a pipeline of agents from your workspace. The proposal lands on an editable canvas, so you always review — and can fully rework — the plan before saving.
Open Build → Workflows and click Create workflow. The screen has three parts: the goal prompt, the pipeline canvas, and the name/schedule form.
Select a workspace from the Build picker first. The planner only composes agents from the selected workspace, and the saved workflow belongs to it.
Describe your goal
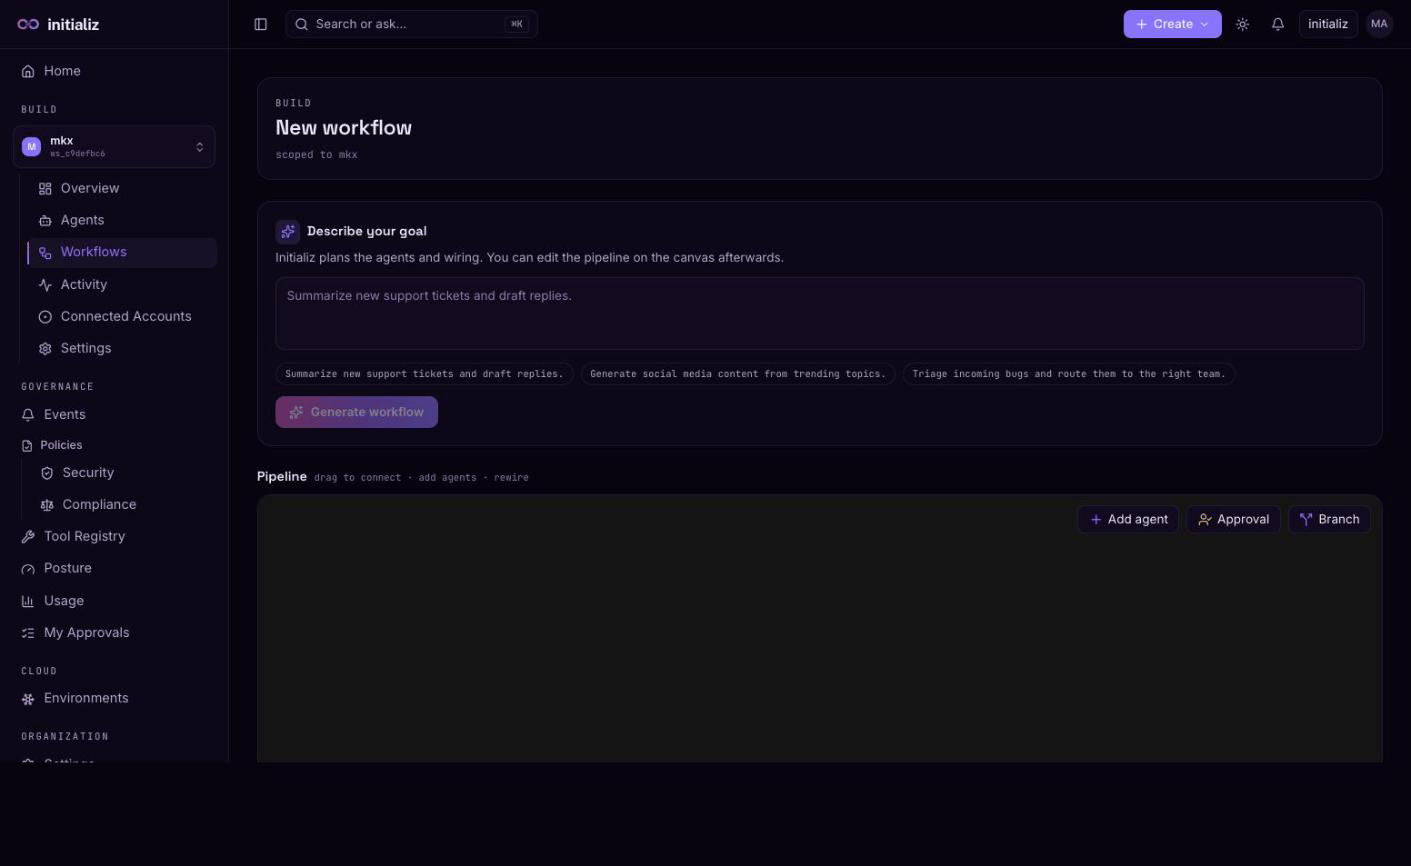
Type a goal in plain language — for example, "Summarize new support tickets and draft replies" — and click Generate workflow. The planner looks at the agents available in your workspace and returns a proposed pipeline: which agents to call, in what order, and how each step's message is wired to user inputs and to previous steps' outputs.
Two outcomes are possible:
- A pipeline is generated — the proposed nodes appear on the canvas below, ready to edit.
- No pipeline could be generated — the planner returns a message explaining why (for example, no suitable agents exist for the goal). You can refine the goal and try again, or build the pipeline manually on the canvas.
If the planner backend is unreachable, the screen tells you so and manual building still works — goal planning is a convenience, not a requirement.
Edit the pipeline
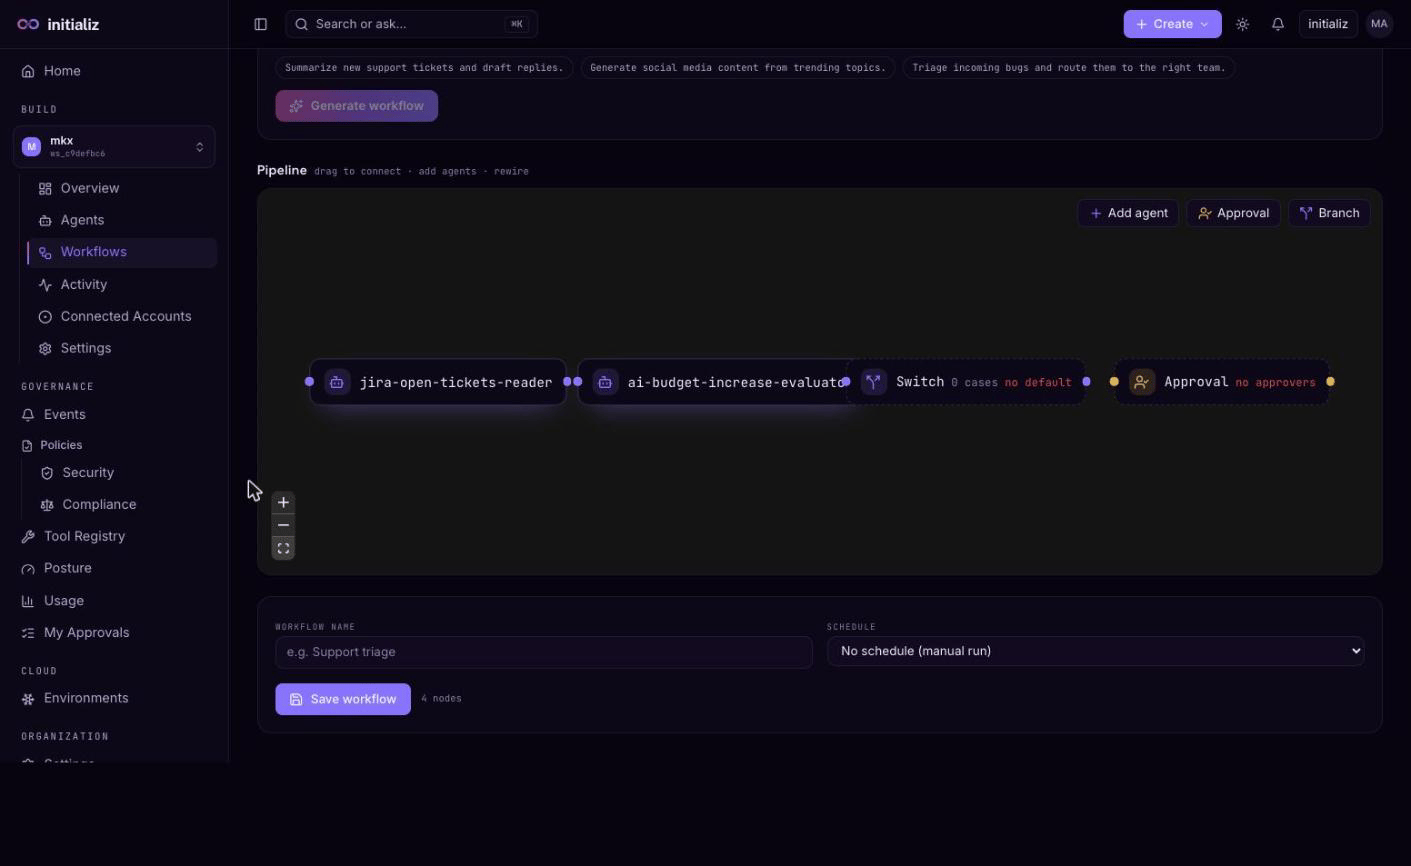
The canvas is fully editable whether you started from a generated plan or from scratch: add agents, remove nodes, drag to connect, and rewire the order. The Add agent menu offers the workspace's deployed agents plus any registered external agents (see Agents in workflows), and the toolbar's Approval and Branch buttons add human decision points and conditional branches — see Branching and approval gates.
Selecting a node opens its inspector, where the step is configured
without leaving the canvas: swap the agent behind the step, edit the message's
data fields and text (with $ref quick-inserts for run inputs and upstream
outputs), declare the step's output keys, set an explicit Next step, or
fall back to raw JSON for irregular shapes.
Each node's message can carry input placeholders that resolve at run time — in text parts as well as structured data fields:
$userinput.<key>— a value the person (or schedule, or webhook call) starting the run provides. Every distinct key becomes a required input field on the Run panel.$<nodeId>.<key>— a value from an earlier node's output, which is how data flows from one step to the next. Drawing a connection between two nodes wires this for you: the downstream step's message text references the upstream step's output.
A node can also carry its message values baked in, in which case the run needs no input for that step.
How run inputs are derived
The planner does not leave run-time parameterization to chance. When an
agent's registered skills carry typed input schemas, every required field
that is not fed by a previous step is mapped to a $userinput.<field>
placeholder — even where the model would have baked a literal value in. For
agents without schemas, a plan whose entry step would otherwise carry a fixed
(or empty) message gets a single $userinput.input placeholder, so a planned
workflow is always runnable with fresh inputs rather than frozen to the goal
text. Values you type into a message yourself and then save are treated as
your content and stay pinned.
Name, schedule, and save
Below the canvas, give the workflow a name (required) and optionally a schedule:
- No schedule (manual run) — the workflow only runs when someone starts it.
- Hourly / Daily / Weekly / Monthly — the platform creates a recurring trigger that starts a run automatically (daily/weekly/monthly fire at 09:00 UTC; weekly on Monday, monthly on the 1st).
Click Save workflow. The workflow is created in the active state and the console takes you to its detail page, where you can run it immediately. The schedule can be changed or removed later by updating the workflow — and the pipeline itself stays editable on the detail page: click Edit in its Pipeline section to reopen the canvas and inspector on the saved workflow, then Save to apply (or Cancel to revert). Saving is not a one-way door.
Saving does not run the workflow. Nothing executes until you start a run or the schedule fires — see Running and monitoring.