Settings
-
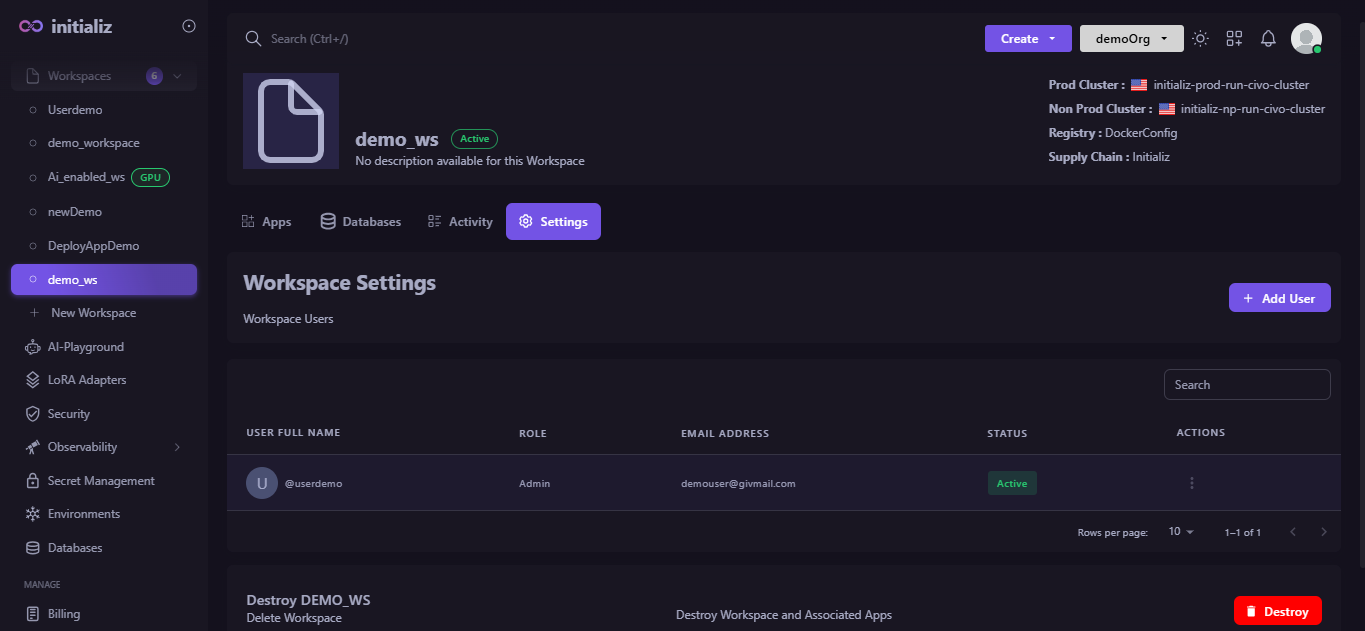
Access the settings of workspace
To access the settings section, follow these steps:
-
Select the respective workspace whose settings you want to access..
-
After selecting the workspace, you will see an option for settings. Click on Settings.
-
-
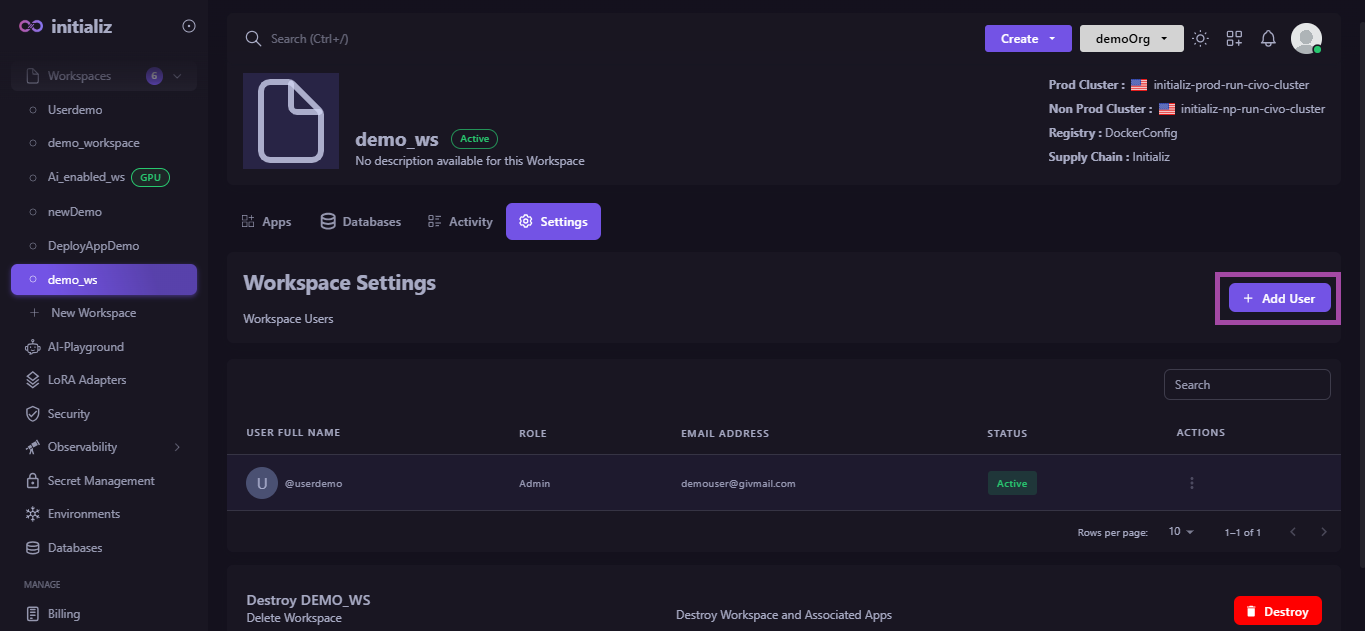
Adding user to the workspace
To Add a user, follow these steps:
-
Open the Settings section of the workspace, where you will see the option to Add User, Click on Add User.
-
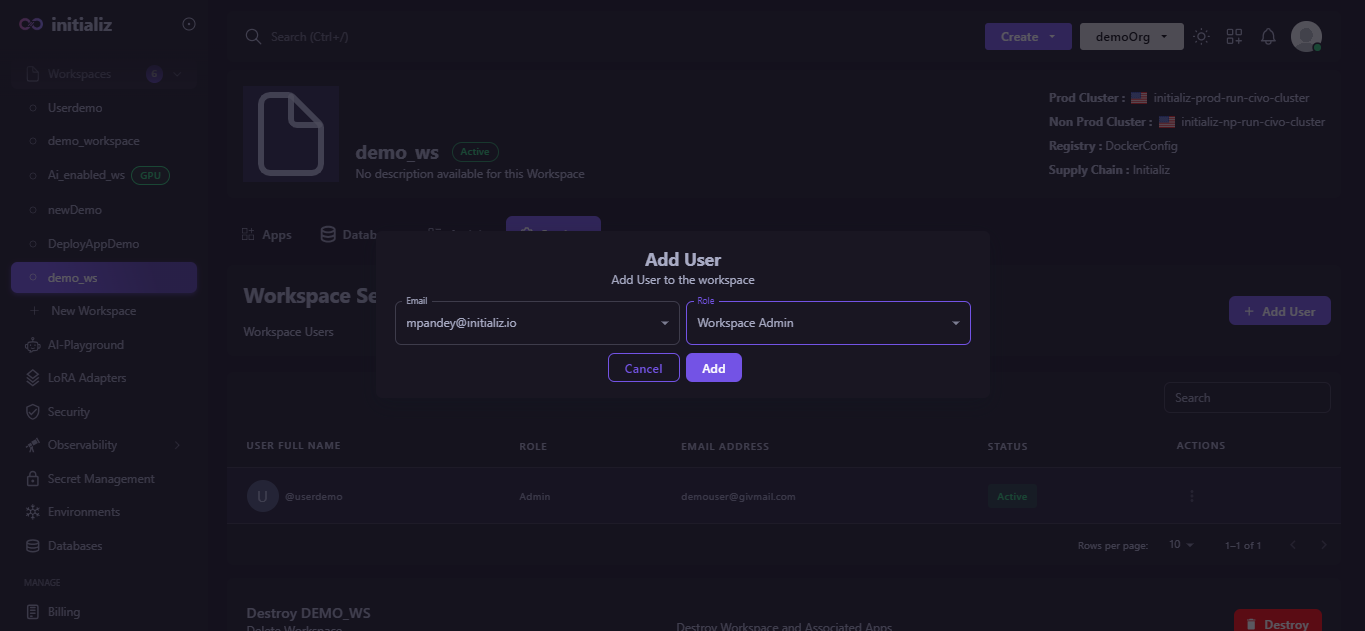
You need to select the user's email and role.
noteEnsure the user is already invited to the organization; otherwise, their email will not be available when selecting. (How to invite a user to the organization)
-
After selecting the email and role, click on Add.
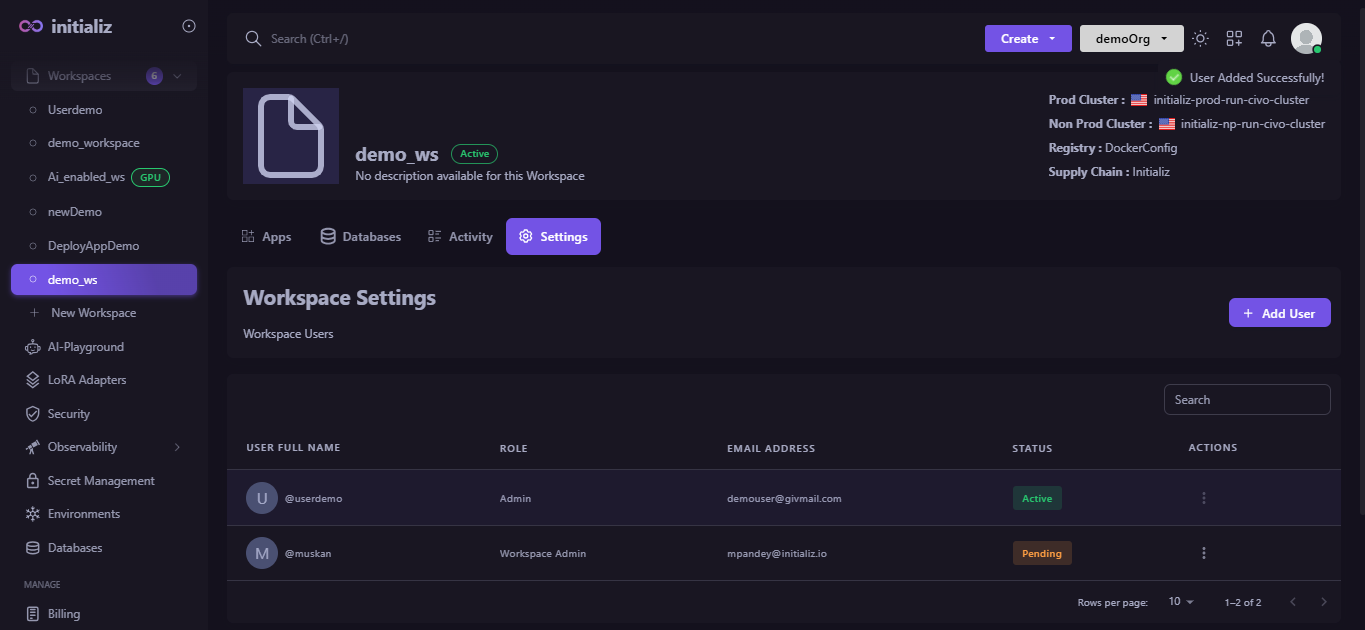
The user is now successfully added to the workspace with the specified role.
-
-
Update the user in the workspace.
To update a user, follow these steps:
-
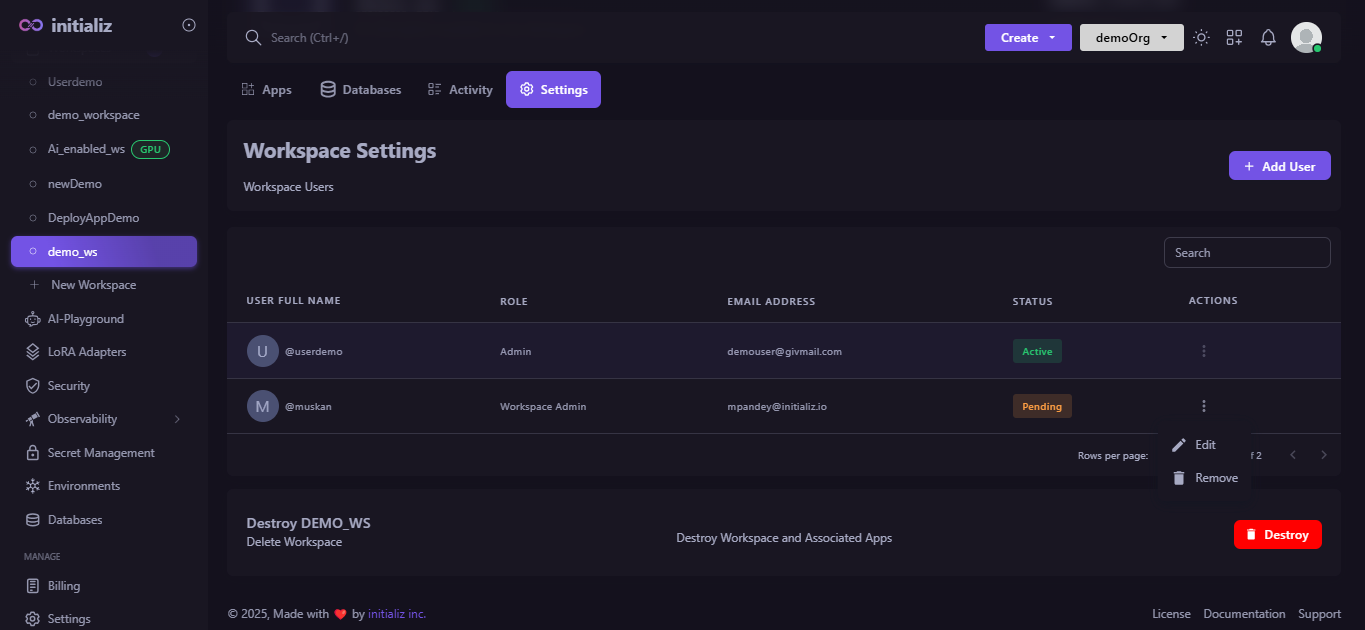
Open the Settings section of workspace, you will get the list of existing users.
-
Click on the three dots next to the user you wish to update.
-
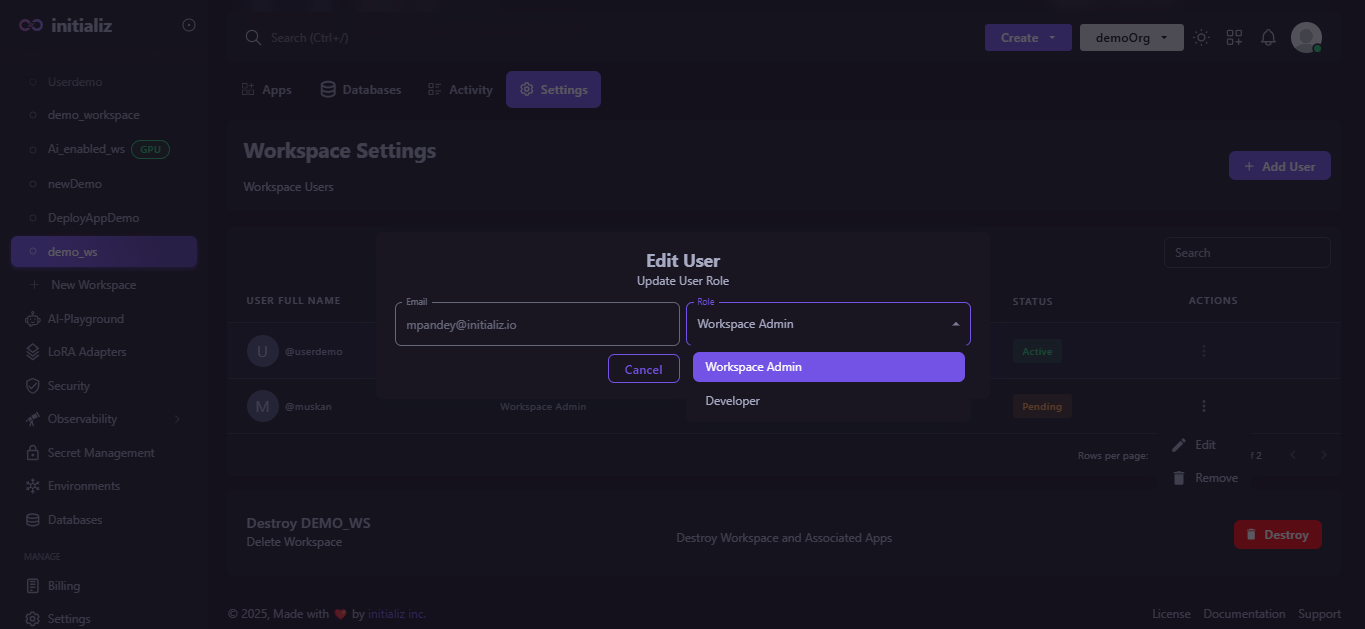
Select Edit from the menu.
-
Only the user's role can be updated.
-
After making the necessary changes, click Update.
After clicking Update, the changes will be applied successfully.
-
-
Remove the user from the workspace
To remove the user, follow these steps:
-
Open the Settings section, you will get the list of existing users.
-
Click on the three dots next to the user you wish to delete.
-
Select Remove from the menu.
-
Click on Yes.
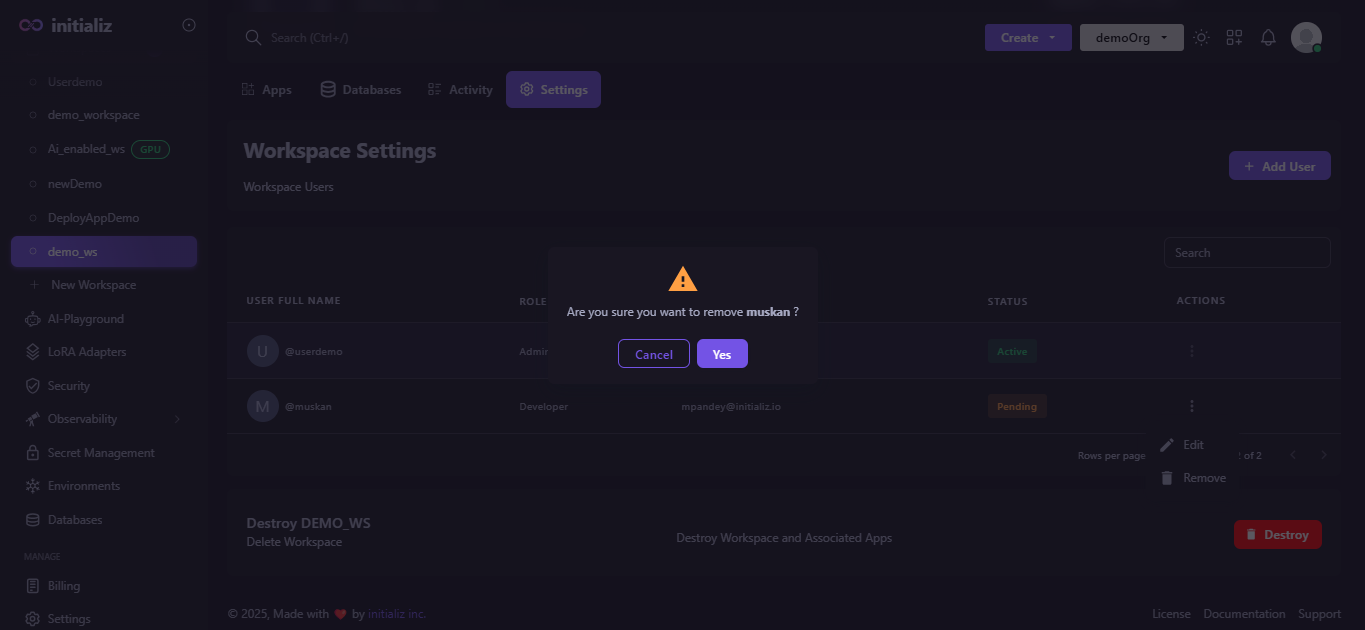
After clicking Yes, the user will be successfully removed from the organization.
-
-
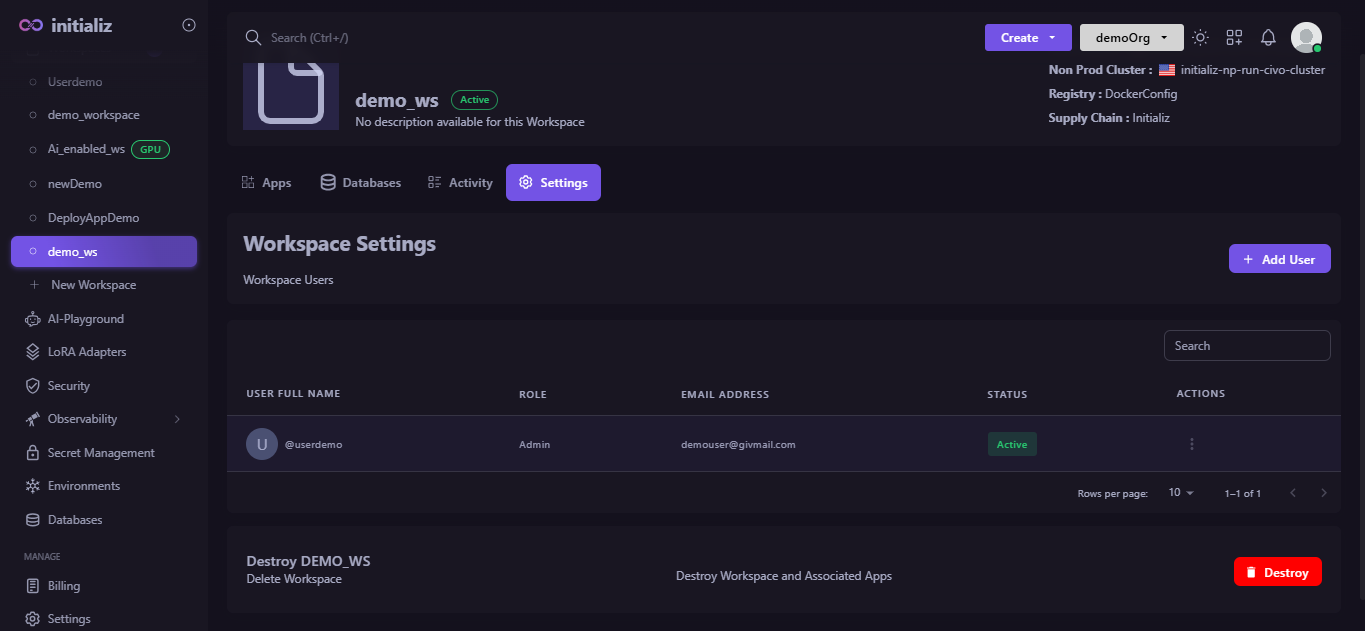
Delete the workspace
In the Settings section, at the bottom of the page, you will find an option labeled Destroy. Click on Destroy to proceed with deleting your workspace along with associated applications.
- Only Admins or Workspace Admins have permission to access the workspace settings.
- You can add a user for the roles of "Workspace-admin" and "Developer" only.
- If you delete the workspace, all associated applications will also be deleted.