
Creating an agent
Create an agent in the console — start from a catalog skill or describe one in plain English, then configure the name, model, variables, and channels.
Agents are created from Build → Agents → New agent in the console. The create flow has two steps: choose (or generate) the agent's skill, then configure the agent around it.
Agent creation is scoped to the currently selected workspace. If your organization has no workspace yet, the console walks you through creating one first.
Step 1 — choose how the agent starts
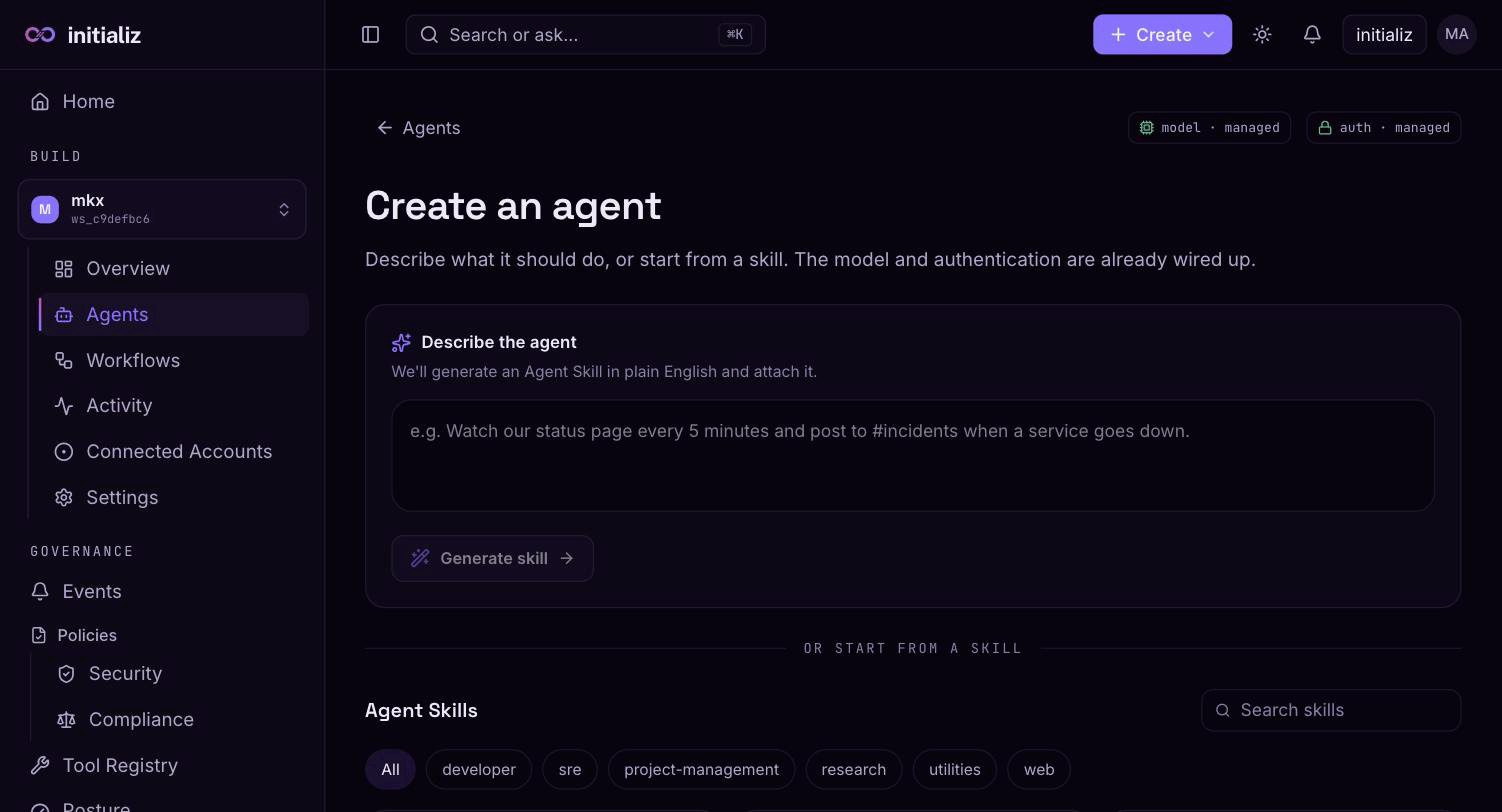
The entry screen offers two paths:
- Describe the agent — type what the agent should do in plain English (for example, "Watch our status page every 5 minutes and post to #incidents when a service goes down") and click Generate skill. This opens the conversational skill builder, which drafts a skill — including instructions and any scripts — that you refine in a chat before moving on. See Skills for the full builder flow. This path is available when your platform's builder service is configured; otherwise it shows as coming soon.
- Start from a skill — pick a tile from the skill catalog. Skills are grouped by category (developer, SRE, research, utilities, and so on) and searchable; each tile shows its description, how many variables it needs, and any extra egress it declares.
Either way you land on the same configure screen, prefilled from the skill's declared schema.
If you left a skill-builder conversation unfinished earlier, the entry screen also shows a Continue where you left off card listing your open draft sessions — resume one instead of starting over. See Skills for how builder sessions work.
Step 2 — configure the agent
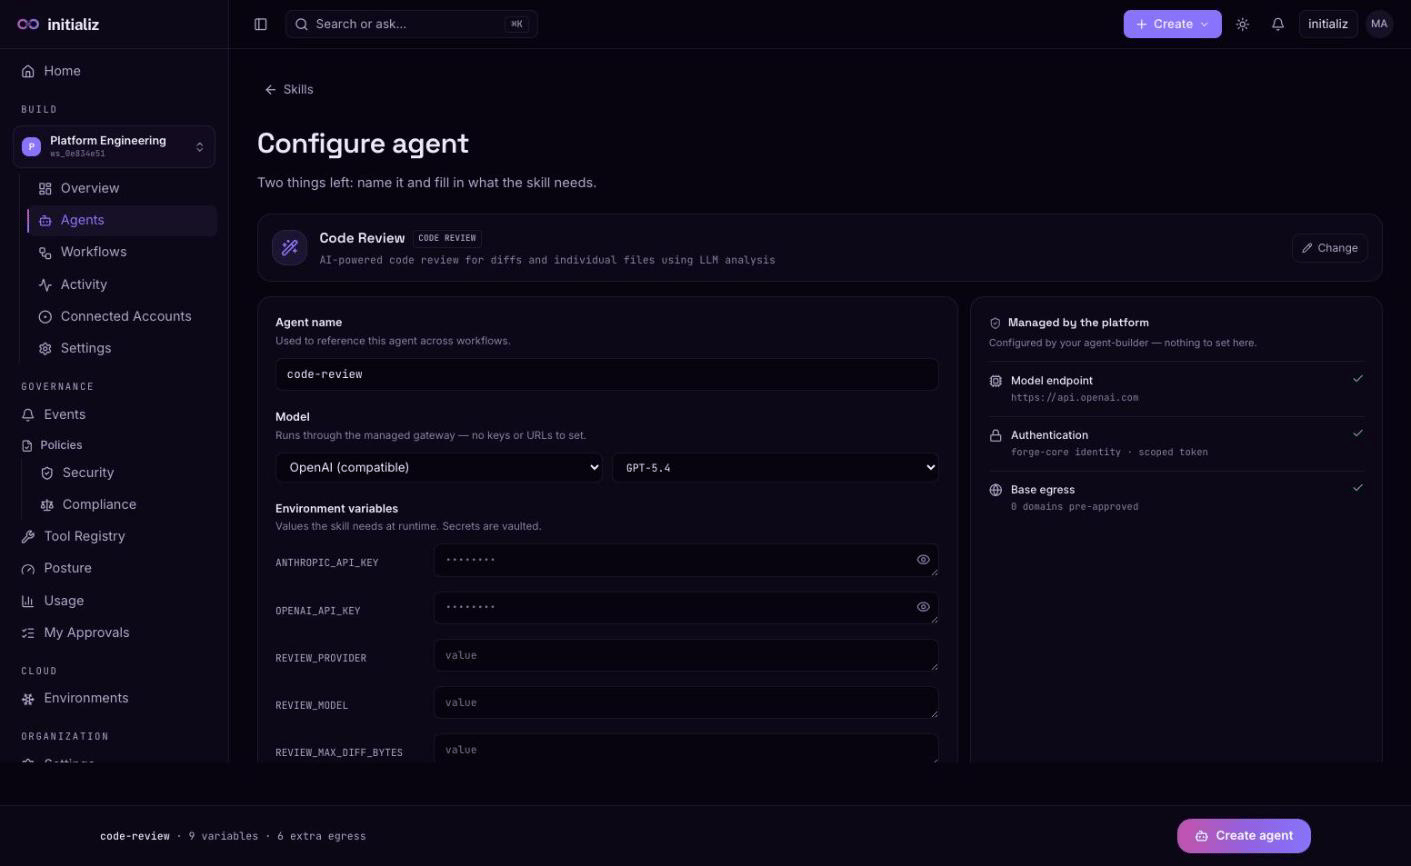
The configure screen collects everything the agent needs before its first build:
- Agent name — how the agent is referenced across the platform, including in workflows.
- Model — a provider and model, picked from the set your platform offers. Several providers (for example an OpenAI-compatible provider and Anthropic side by side) can be offered together, each with its own model list. Requests run through the managed gateway, so there are no API keys or URLs to enter. See Channels and providers.
- Environment variables — values the skill needs at runtime. Variables flagged as secrets are masked and vaulted; required variables must be filled before you can create. You can add extra variables beyond what the skill declares.
- Additional egress — domains the agent may reach beyond the platform-managed base set. Hosts required by any governed tools you select are added automatically and shown read-only.
- Tools — governed tool dependencies from your organization's tool registry: command-line tools, MCP servers, or REST APIs registered from their OpenAPI specs. Selecting a tool that requires a token adds a corresponding secret variable to fill in.
- Trigger — whether the agent is human-triggered or scheduled / autonomous. An autonomous agent has no requesting person, which changes how its tools are allowed to act. Autonomous agents can also carry recurring schedules that the platform runs for them.
- Endpoint reachability — how far the agent's endpoint can be reached: Cluster-only (the default) keeps it callable only from inside the platform; private and public, when your environment offers them, expose it at a platform-provisioned URL (host and TLS included — nothing to configure). An exposed agent's page shows the resulting address once deployed, including a shareable public Agent Card link. If your environment offers no exposure tiers, agents are cluster-only and the picker says so. See Channels and providers.
- Slack channel — optionally let people talk to the agent in Slack and receive tool-approval prompts there. This needs a dedicated Slack app per agent (an app token and a bot token).
- Observability — two toggles, both off by default: capture audit payloads (record redacted tool and model inputs/outputs in audit events) and context compression (reversibly compress bulky tool outputs to save context).
- Governance — the Enforce PDP policy toggle, off by default. When on, every tool call the agent makes is checked against your compliance policies over its actual argument values, and enforcement is fail-closed: with the toggle on and no matching rule, tool calls are denied. See Compliance and tool-call decisions.
- Metadata tags — optional key=value tags applied to the agent's
runtime metadata (useful for inventory, cost attribution, or tooling
that reads deployment metadata). Keys allow
a–z 0–9 - _ .; other characters are folded to_. Acreated-byandworkspace-idtag are added automatically and can't be overridden.
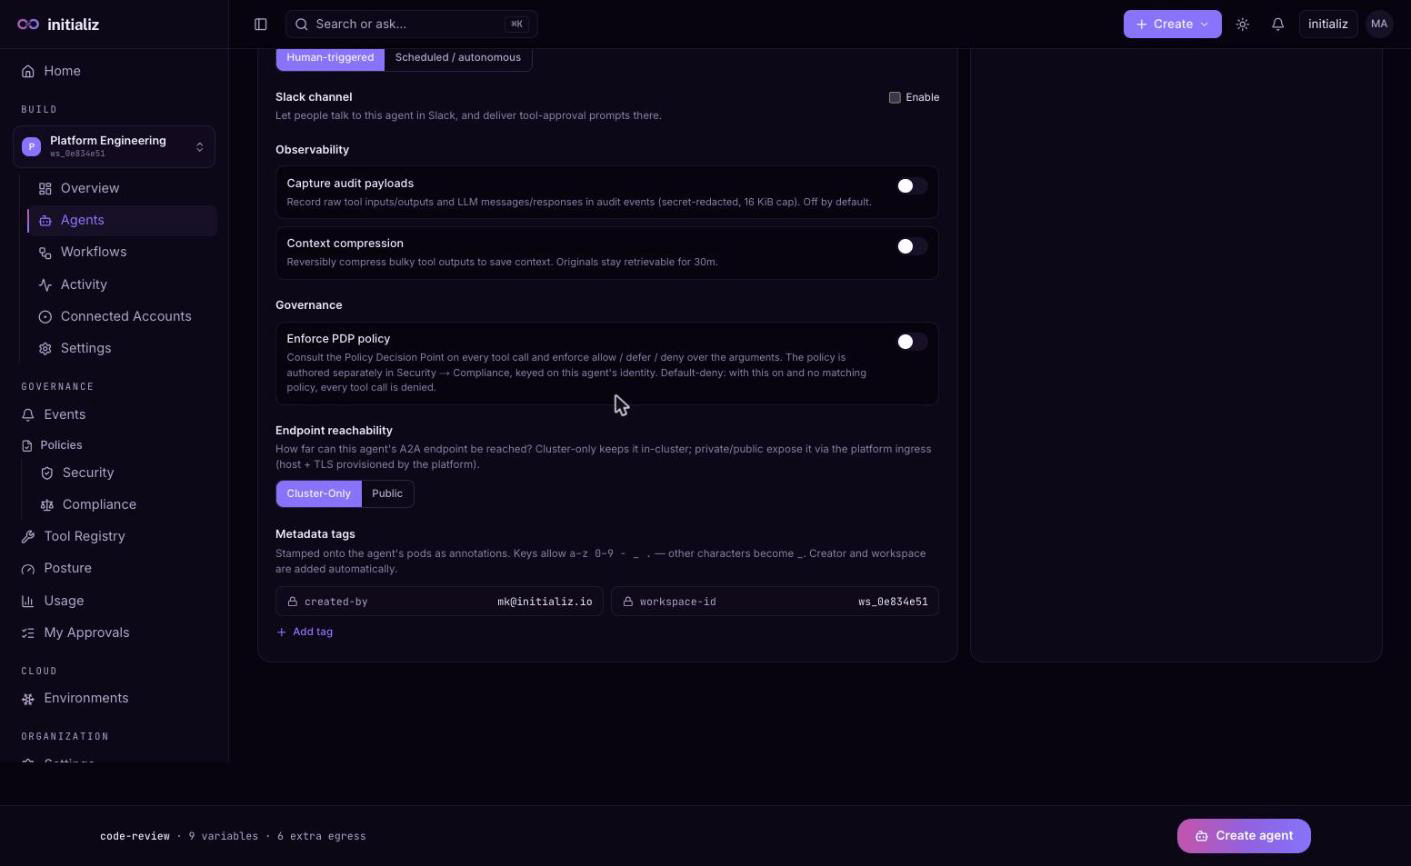
A read-only Managed by the platform panel alongside the form shows what you never have to configure: the model endpoint, authentication, and the pre-approved base egress domains.
Create and watch the build
Click Create agent. The build and deployment start immediately and the screen switches to a live progress view with streaming logs — see Building and deploying for the phases, health states, and what to do if something fails.