
Build a multi-agent workflow from a goal
An end-to-end walkthrough — describe an outcome in plain language, review the planned pipeline on the canvas, run it, watch each step in the timeline, and iterate.
This guide walks the whole journey from a one-sentence goal to a monitored multi-agent run. A workflow chains deployed agents into a pipeline: each step dispatches a message to one agent, and its output feeds the next. Each step of the guide links to the reference page that covers it in depth.
Before you start
- A workspace. Workflows belong to the workspace selected in the Build picker, and the planner only composes agents from that workspace.
- Deployed, running agents. A workflow step dispatches to a live agent — agents that exist but are not deployed and running are filtered out of the picker, and the planner cannot use them. Build at least one first: see Create an agent with the skill builder. Two or more agents make the multi-agent wiring worth watching.
- External agents, if you want them in the mix. Agents running outside the platform can join a pipeline once registered in the workspace with their endpoint and credential — they appear in the same picker suffixed (external). See Agents in workflows.
Step 1 — describe the goal
Go to Build → Workflows and click Create workflow.
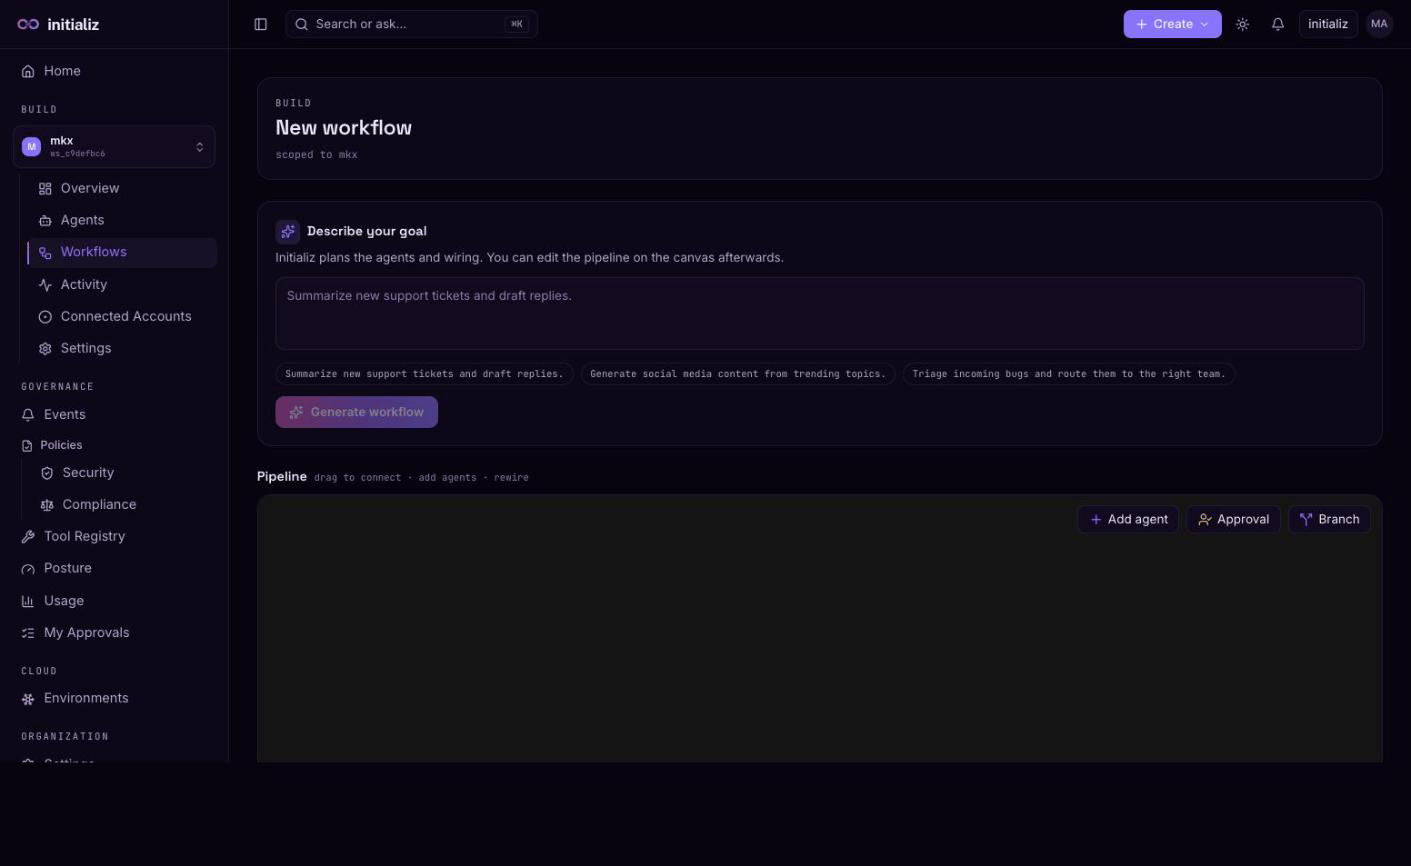
Type what should happen, in plain language, into the Describe your goal box — or click one of the suggestion chips below it to start from an example such as:
Summarize new support tickets and draft replies.
Click Generate workflow. The planner looks at the agents available in your workspace and proposes a pipeline: which agents to call, in what order, and how each step's message is wired to user inputs and to previous steps' outputs. The proposal lands on the canvas below, ready to edit — planning drafts, it never decides; nothing is saved yet.
If no pipeline could be generated, the planner says why (for example, no suitable agents exist for the goal) — refine the goal and try again, or build the pipeline by hand on the canvas. If the planner backend is unreachable, manual building still works. See Planning a workflow for the full create screen, including input placeholders.
Step 2 — review and edit the pipeline
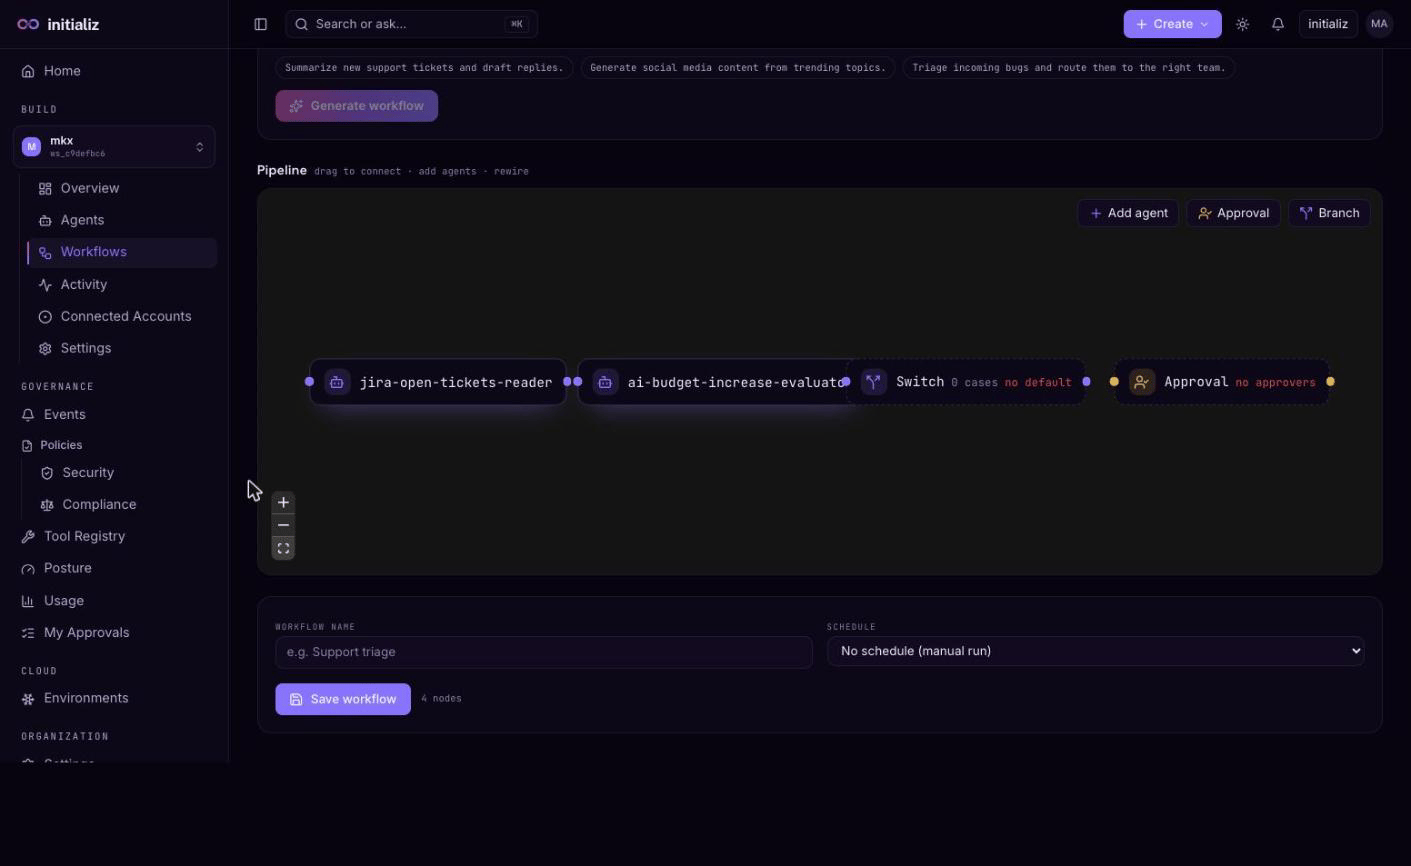
Every node on the canvas is one agent step, labeled with the agent's name; the arrows between nodes are the order and the data flow — a connection feeds the upstream step's output to the downstream step as its message. The canvas is fully editable before you save:
- Add a step — the Add agent button lists the workspace's deployed agents and any registered external agents; picking one drops a new node on the canvas. The Approval and Branch buttons beside it add a human decision point or a conditional branch — see Branching and approval gates.
- Configure a step — click a node to open its inspector: swap the
agent behind the step, edit the message's fields and text (with
$refquick-inserts for run inputs and upstream outputs), set its output keys, or choose an explicit next step. - Rewire the order — drag from one node's right handle to another's left handle to connect them; select a connection and press delete to break it, then reconnect differently.
- Remove a step — select the node and press delete; its connections go with it.
- Rearrange — drag nodes anywhere; position is visual only, the connections define the order.
Two things to know about the wiring: a connection feeds the upstream step's output into the downstream step's message text, and a step with no incoming connection starts from the run's inputs instead — finer-grained field mapping lives in the node inspector via the pipeline's input placeholders (see Planning a workflow).
Generating again replaces the canvas with the new proposal, so settle the goal first, then fine-tune by hand. Saving is not final, though: the detail page's Pipeline section has an Edit button that reopens the canvas and inspector on the saved workflow.
Step 3 — save and run
Below the canvas, give the workflow a name (required), optionally pick a schedule, and click Save workflow — saving alone runs nothing. The console lands on the workflow's detail page; click Run in the header.
- If the pipeline declares
$userinput.<key>placeholders, the Run panel opens with one field per key — all are required, so a run never fires with an unresolved placeholder. - If it declares none, the run starts immediately; the panel's dropdown still lets you pass extra fields as raw JSON when an agent expects them.
The run starts asynchronously and the console drops you straight onto its execution page. A run is refused with an explanatory error when the workflow is orphaned — an agent it dispatches to was removed — see Agents in workflows for how it recovers. Everything about inputs, schedules, and the executions list is covered in Running and monitoring.
Step 4 — monitor the run
The execution page refreshes itself every few seconds while the run is in progress, so you can watch it live:
- The step timeline shows one row per pipeline step, in order: the
step currently executing pulses as running, steps not yet
dispatched show as queued, and finished steps carry their real
reported status —
completed,failed,input-required, orauth-required— along with the agent's output or error inline. input-requiredandauth-requiredmean the step is waiting on a person — an approval, extra input, or an account connection. The run stays running while the step waits; nothing needs restarting. Once the person acts (for a deferred tool call, see Approvals), the run picks up on its own. A pipeline can also pause deliberately at an authored approval gate, shown as awaiting approval with a link to the approver's queue.- Every step runs against a time budget — 35 minutes by default, including time spent waiting on a person — after which the step and the run are marked failed.
- Runs are durable: an execution in progress survives platform restarts and upgrades, resuming from the step that was in flight with finished steps' results intact.
- The runtime events section below the timeline is the audit trail every agent emitted during this run — tool calls, LLM calls, egress decisions, denials — correlated by execution id and grouped into an expandable section per step (steps with a denial or error start expanded).
For the executions list, failure diagnosis, and the at-least-once delivery contract, see Running and monitoring.
Step 5 — iterate and share
To iterate, click Run again from the workflow detail page — each run is a fresh execution, listed on the detail page with its status and duration, so you can compare attempts side by side. Resuming a failed or on-hold execution in place — starting the workflow again with its execution id so the current step re-runs — is an API capability; the console does not currently surface a resume control.
Sharing works the same way today: workflows can be shared with teammates by email through the platform API, with each share recorded in the workspace activity feed, but there is no sharing screen in the console yet. See Sharing for the checks and lookups involved.
If iteration means changing the pipeline itself — new steps, different agents, a branch or an approval gate — click Edit in the detail page's Pipeline section: the same canvas and node inspector reopen on the saved workflow, and Save applies the change (the Run panel's input fields and the workflow's status recompute from the new pipeline). And remember that removing an agent orphans every workflow that dispatches to it, so check the dependency preflight in Agents in workflows before deleting one.
To hand the workflow to another system entirely, enable its webhook trigger — a secret URL that starts a run on a single POST, no console needed.
Run an agent on a schedule
Make an agent do recurring work on its own — set the scheduled / autonomous trigger, declare cron schedules, deploy, and verify the runs actually fire.
Lock down an agent's egress
Tighten what an agent can reach on the network, layer by layer — the org egress ceiling, workspace policy, the agent's own domain allowlist, and the advanced runtime narrowings — then verify a block end to end in the event stream.